Note these consumptions are refreshed once per hour.
### Technical details All the technical information you need to know about your server. ### Billing details A quick overview about prices and billing cycle of your server. ### Related contracts The contracts you signed when you subscribed to this offer.Note the given link take you to the exact contracts you signed as they were at the time of signing, and therefore as they apply in your case, for this server.
# Plesk All Hosterra's storage servers are equipped with Plesk software, which allows you to make all the operational settings for these services. The version of Plesk installed on your server is a special version, customised to take into account the characteristics of Hosterra servers and services. Please note that the screenshots in this book may differ slightly from what you will see on your server. This is because the version installed on your server is regularly updated and improved. ### Official documentation Plesk is a very popular and widely used piece of software. So you'll find plenty of documentation, tutorials and videos about it on the web. The reference for using Plesk can therefore be found directly on the Plesk website: - the [Quick Start Guide](https://docs.plesk.com/en-US/obsidian/quick-start-guide/) - the [Customer's Guide](https://docs.plesk.com/en-US/obsidian/customer-guide/) It contains everything you need to know to set up your server's standard functionalities correctly. However, if you want to understand and use the features specific to Hosterra, we recommend that you read this present book too. # Server access You can access your server via a number of methods and tools. # Web UI The easiest way to access your server is from your [Hosterra account](https://hosterra.help/books/hosterra-account "Hosterra Account"). To do this, click on the service you want to manage and then in [the service details page](https://hosterra.help/books/storage/page/user-interface-overview-TbU "User interface overview"), click on the **Plesk Login** button to access the Plesk interface of your server. You can also connect directly to your server Plesk interface with the credentials and url we sent you by email after your purchase… [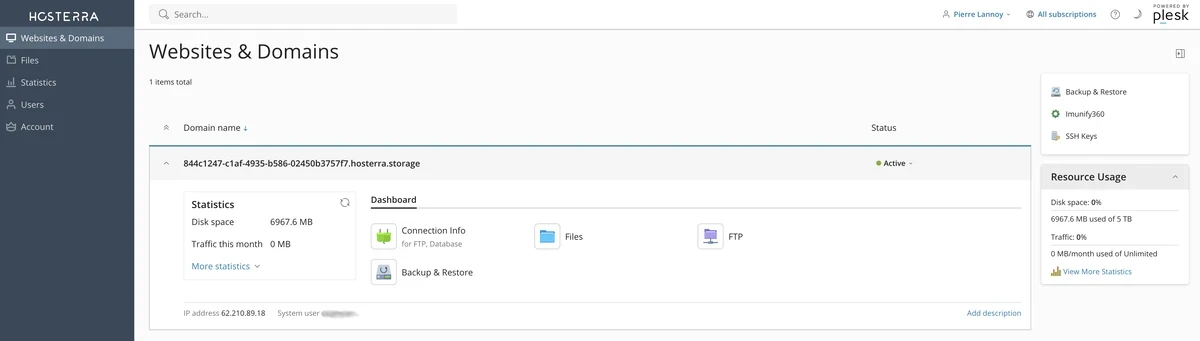](https://hosterra.help/uploads/images/gallery/2023-11/storage-plesk-en.webp) # SSH access For security reasons, the Storage servers are only reachable via SSH with keys (and not with a password). To access to your server you have to start by [adding the key](https://hosterra.help/books/storage/page/managing-ssh-keys "Managing SSH keys")(s) you want to use. Once a key added to your server, you can access it by the standard way: ```shell > ssh username@tabarly.hosterra.tech ⣴⠛⠛⠛⠛⠛⠛⠛⠛⠛⠛⠛⠛⠛⠛⠛⠛⠛⠛⠛⠛⠛⠛⠛⠛⠛⠛⠛⠛⠛⠛⠛⠛⠛⠛⠛⠛⠛⠛⠛⠛⠛⠛⠛⠛⠛⠛⠛⠛⠛⠛⠛⠛⠛⠛⠛⠛⠛⠛⠛⠛⠛⠛⠛⠛⠛⠛⠛⠛⠛⠛⠛⠛⠛⠛⠛⠛⣦ ⠻⣤⣤⣤⣤⣤⣤⣤⣤⣤⣤⣤⣤⣤⣤⣤⣤⣤⣤⣤⣤⣤⣤⣤⣤⣤⣤⣤⣤⣤⣤⣤⣤⣤⣤⣤⣤⣤⣤⣤⣤⣤⣤⣤⣤⣤⣤⣤⣤⣤⣤⣤⣤⣤⣤⣤⣤⣤⣤⣤⣤⣤⣤⣤⣤⣤⣤⣤⣤⣤⣤⣤⣤⣤⣤⣤⣤⠟ ⣴⣿⣿⣷⣶⣶⣦⣤⣄ ⢸⣿⣿⣿⣿⣿⣿⣿⣿⣿ ⣿⣿⣿⣿⣿⣯⣉⣉⣉⡉ ⠠⣤⣼⣿⣿⣿⣿⠟⠛⠛⠛⠛⠋ WELCOME! ⠀⠀⠀⠀⠀⠀⠀⠀⠀⠀⠀⠀⠀⠀⠀⠀⠀⠀⠀⠀⢹⣿⣿⣿⣿⡟ ⠀⠀⠀⠀⠀⠀⠀⠀⠀⠀⠀⠀⠀⠀⠀⠀⠀⢲⣶⣶⣿⣿⣿⣿⣿⠁⠀⠀⠀⠀⠀⠀⠀ HOSTERRA SERVERS ACCESS ARE ⠀⠀⠀⠀⠀⠀⠀⠀⠀⠀⠀⠀⠀ ⢀⣀⠀⢈⣿⣿⣿⣿⣿⣿⣿⣄⠀⠀⠀⠀⠀⠀ SUBMITTED TO PRIVACY & SECURITY ⠀⠀⠀⠀⠀⠀⠀⠀⠀⠀⠀⠀⠀⠀⠀⣿⣿⣿⣿⣿⣿⣿⣿⣿⣿⣿⣷⣄⠀⠀⠀⠀ POLICIES ⢀⠀⠀⠀⠀⠀⠀⠀⠀⠀⠀⠀⣤⣀⣠⣿⣿⣿⣿⣿⣿⣿⣿⡟⣿⣧⠙⠻⣷⣄⡀ ⠘⣷⣄⠀⠀⠀⠀⠀⢀⠀⠀⠀⣿⣿⣿⣿⣿⣿⣿⣿⣿⣿⣿⠃⠾⠿⠟⣿⠛⠛⠁⠀ LEGAL.HOSTERRA.EU/SSH ⠀⠘⣿⣿⣦⣀⠀⠀⢸⣿⣦⣾⣿⣿⣿⣿⣿⣿⣿⣿⣿⣿⠏⠀⠀⠀⠀⢸⡇ ⠀⠀⠘⢿⣿⣿⣿⣿⣿⣿⣿⣿⣿⣿⣿⣿⣿⣿⣿⣿⣿⠋⠀⠀⠀⠀⠀ ⣷⠀ ⠀⠀⠀⠀⠙⢿⣿⣿⣿⣿⣿⣿⣿⣿⣿⣿⣿⣿⣿⣿⣷⡀⠀⠀⠀⠀⠀⠀⣿⡄ ⠀⠀⠀⠀⠀⠀⠈⠙⠛⠛⠛⣿⣿⣿⡿⠛⠉⠁⠙⢿⣿⣷⡄⠀⠀⠀⠀⣼⠿⣇⠀⠀ ---------[ HOSTERRRA ]--------- ⠀⠀⠀⠀⠀⠀⠀⠀⠀⠀⣼⣿⡿⠋⠀⢠⣶⣦⡄⠈⠻⣿⣿⣶⣶⠀⣰⡏⢠⣿⣶⡄ Ethical & Sustainable Hosting ⠀⠀⠀⠀⠀⠀⠀⠀⠀⠀⢿⡟⠁⠀⠀⠹⣿⣿⠟⠛⠛⠛⠛⠛⠛⠛⠛⠀⠸⢿⣿⠏ ⣴⠛⠛⠛⠛⠛⠛⠛⠛⠛⠛⠛⠛⠛⠛⠛⠛⠛⠛⠛⠛⠛⠛⠛⠛⠛⠛⠛⠛⠛⠛⠛⠛⠛⠛⠛⠛⠛⠛⠛⠛⠛⠛⠛⠛⠛⠛⠛⠛⠛⠛⠛⠛⠛⠛⠛⠛⠛⠛⠛⠛⠛⠛⠛⠛⠛⠛⠛⠛⠛⠛⠛⠛⠛⠛⠛⠛⣦ ⠻⣤⣤⣤⣤⣤⣤⣤⣤⣤⣤⣤⣤⣤⣤⣤⣤⣤⣤⣤⣤⣤⣤⣤⣤⣤⣤⣤⣤⣤⣤⣤⣤⣤⣤⣤⣤⣤⣤⣤⣤⣤⣤⣤⣤⣤⣤⣤⣤⣤⣤⣤⣤⣤⣤⣤⣤⣤⣤⣤⣤⣤⣤⣤⣤⣤⣤⣤⣤⣤⣤⣤⣤⣤⣤⣤⣤⠟ Last login: Fri Oct 27 15:29:15 2023 from 90.103.x.x [username@tabarly ~]# ``` # SFTP access For security reasons, the Storage servers are only reachable via SFTP with keys (and not with a password). To access to your server you have to start by [adding the key](https://hosterra.help/books/storage/page/managing-ssh-keys "Managing SSH keys")(s) you want to use. Once a key added to your server, you can access it with any software that supports SFTP (Filezilla, Forklift, etc.). Make sure you use the following settings: - Server: the full name of your server, for example `tabarly.hosterra.tech` - Port: `22` - Username: the username we sent you by email after your purchase - Password: none # FTP access For minimal security reasons, the Storage servers are only reachable via **FTPs** (also called FTP TLS). So, you must set your favorite software (Filezilla, Forklift, etc.) with the following parameters: - Protocol: FTP TLS - Server: the full name of your server, for example `tabarly.hosterra.tech` - Port: `21` - Username: the username we sent you by email after your purchase - Password: the password for this user (initially sent to you by email, and that you have certainly already modified) # Backup & Restore # Backing up your Storage Server With the tools bundled with [Plesk](https://hosterra.help/books/web-hosting/page/plesk "Plesk"), you can choose to backup your entire server account without any external software or plugin. It allows you to "chain" backups from one server to another one. When you are [logged in Plesk](https://hosterra.help/books/web-hosting/page/web-ui "Web UI"), you can access the *backups manager* by opening the Plesk right-hand menu, then click on **Backup & Restore**:[](https://hosterra.help/uploads/images/gallery/2023-09/nLQJgEJvHbcTszz5-backup-restore-en.webp) ### Remote storage settings Unless you want to make a local backup (on the same server), it is best to set up remote storage. By defining a remote storage as the target for your backups, you can be sure that your backups will be stored elsewhere than on the server itself. This is a simple precautionary measure to protect against data loss. To define this remote storage, click on the upper **Remote Storage Settings** button. In the opened screen you can select the type of remote storage you want to use as backup destination: ##### FTP and SFTP It is a very professional solution. It allows you to use your own backup server (like a NAS), a professional file storage service (like the [Flex or Vault services](https://hosterra.eu/store/storage) provided by Hosterra), etc. as backup destination. If you have choice, we recommend that you give priority to SFTP, which is a much more secure protocol than FTP. ##### Cloud drives (Dropbox, Google, OneDrive, etc.) That's a simple solution, and sometimes free for small backup sizes, but it has a huge privacy implication. Choose this if you fully understand all the implications it has for you, your customers and the users of your sites. ##### Object storage (S3 Amazon, DigitalOcean and S3-compatible) It's a professional solution. But it can be expensive, depending on the S3 provider. You have to understand what you are technically doing to use this type of remote storage.If you don't see the remote storage type you want to use, it is because it is not yet activated on your server. You can ask us to activate it just by asking us in a ticket, it's free!
### Instant backup To perform an instant backup, click on the upper **Back Up** button in the *backups manager*. In the opened screen just choose what you want to backup and the destination. The backup will start as soon you click on the "OK" button.Note: if you choose to make local instant backups, the size of the backups will count towards your server disk quota.
### Scheduled backup You can ask Plesk to back up your account on a periodic basis. To do so, click on the upper **Schedule** button in the *backups manager*. In the screen that opens, choose the backup frequency by selecting it (daily, weekly or monthly), then set the parameters of the backup it self.If you want to save on storage size and bandwidth, you can choose incremental backup. If so, Plesk will backup only data that has been modified since the previous backup.
Note: if you choose to make local scheduled backups, the size of the backups will count towards your server disk quota.
# Security # Managing SSH keys Plesk allows you to manage SSH keys. These keys are needed when you want to access your server via SSH command-line, use a software (like FileZilla or Forklift) to upload files via SFTP, or set the backup system bundled with your account. When you are logged in Plesk with the right user, you can access the *keys manager* by opening the Plesk right-hand menu, then click on **SSH Key**: [](https://hosterra.help/uploads/images/gallery/2023-11/ssh-key-en.webp) ### Adding a SSH key to your server To enable other computer or service to connect to your server via SSH (SFTP, rSync, SSHFS, etc.), you need to add a SSH key relating to this computer or service. In most cases, a key is provided by the service you wish to connect from. To import this key into your server, in the *keys manager*, just choose to add a key and paste the key content.Note this key MUST contain a name, which is not always provided. If it's missing, you have to add it at the end of the key, after a space character (the name of the key itself must not contain spaces).
The format of the key to paste in Plesk should be something like that: `ssh-ed25519 ACR5fG...PKOe8MO my_key_name` ### Removing key(s) from your server You can delete one or more SSH keys at any time by selecting it/them in the *keys manager* and clicking on the **Remove** button. After the deletion of a key, the external computer or service that was using it to connect will no longer be able to connect to your server. # Changing your server password The easiest way to change your server password is to do it from your Hosterra account: click on the service you want to manage and then in the window that opened, click in [the left side menu](https://hosterra.help/books/storage/page/user-interface-overview-TbU "User interface overview") on **Change Password** and follow the procedure.It is imperative that you change your password after creating your server. The initial password was sent to you by email.